Introduction:
Services and Components are the fundamental units monitored for security. Groups of Services provide the foundations that make up an Environment and Components make up an Application. This tutorial will guide you through the processes of adding, editing, and deleting services and environments, ensuring effective management and security monitoring of your companies foundations.
We will focus on component management in this article since the steps below are almost identical to services.
- User must be logged in as a admin
- Scanner integration already configured
- You should have at least one Application and/or Environment in the Organisation
1. Creating A Component:
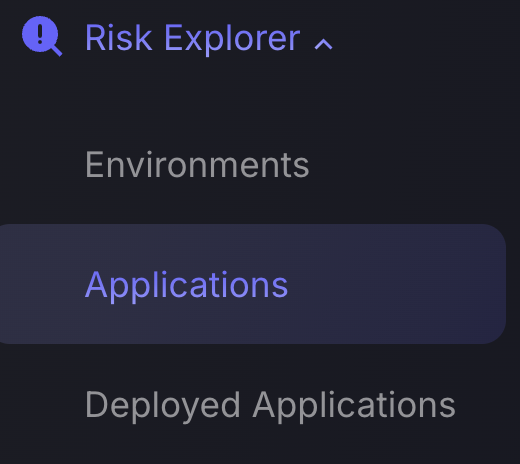
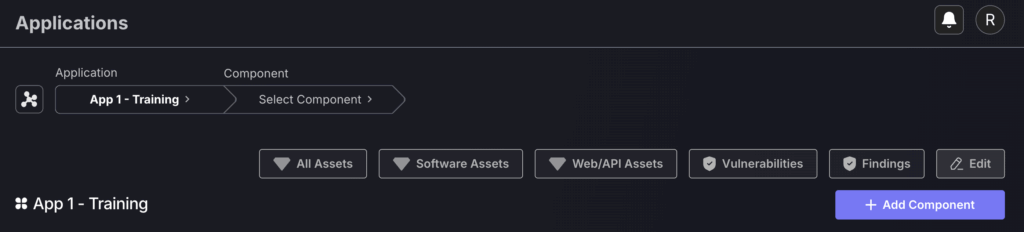
Navigate to Risk Explorer>Applications
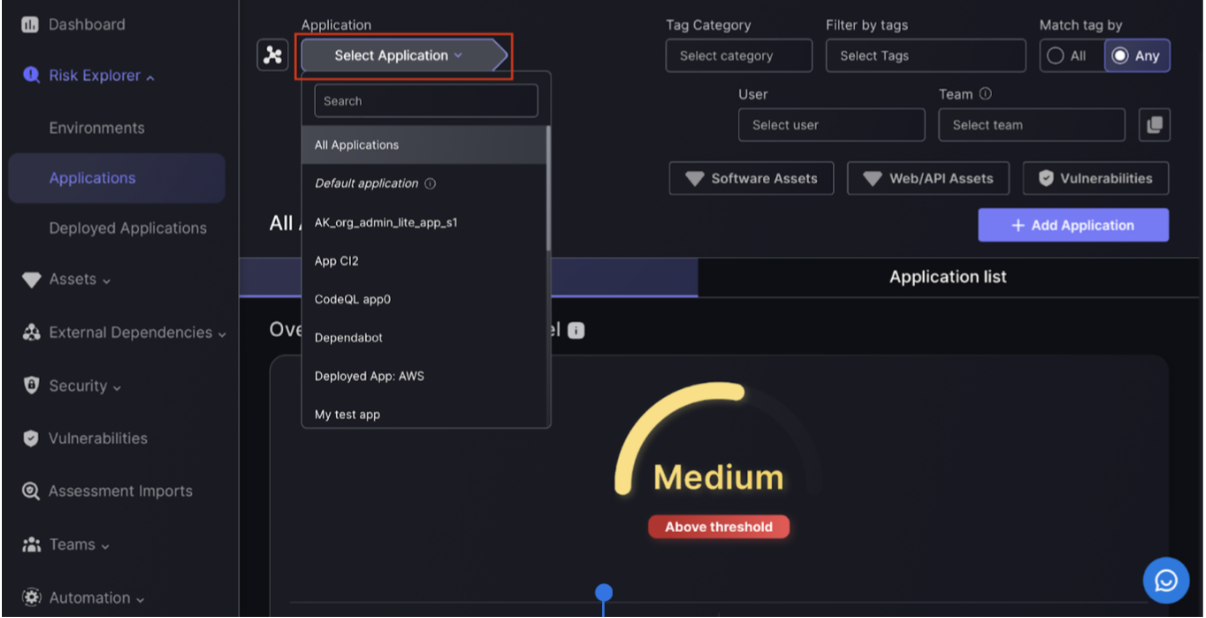
- Select the Application you are adding the Component to from the dropdown menu that appears once you click “Select Application“.
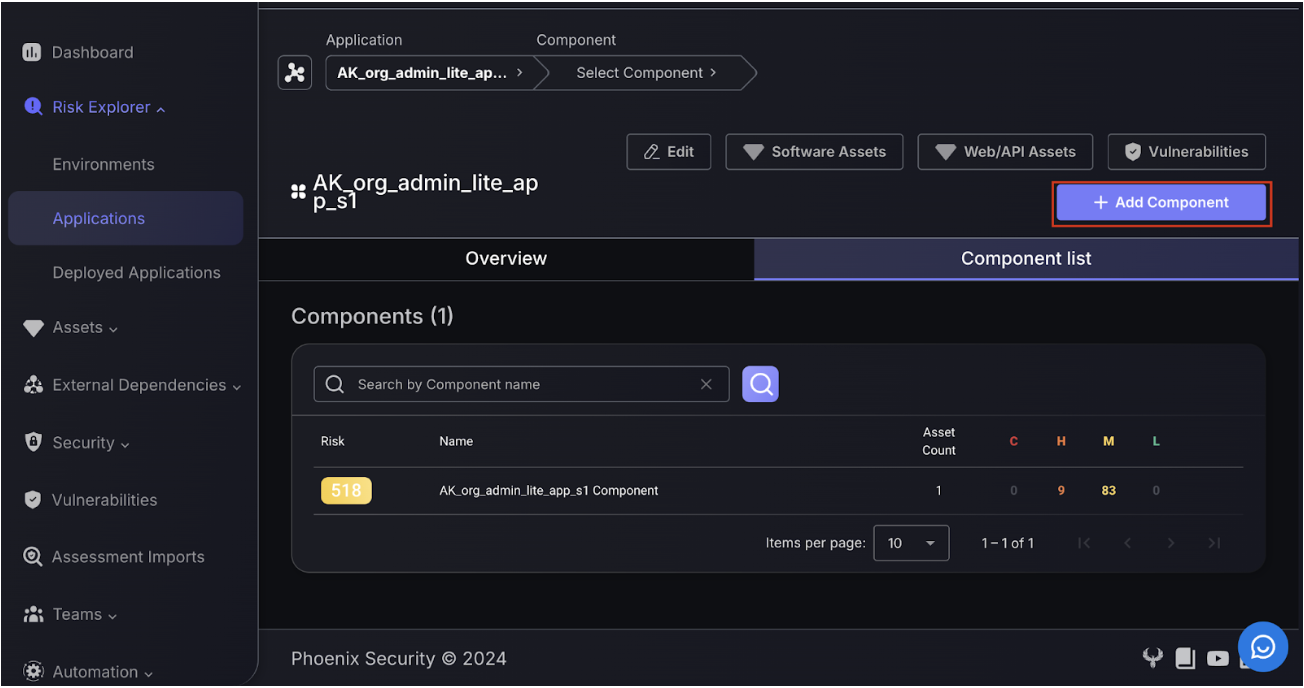
- From the component list, add a component to an application by clicking the “add component” button and following the steps below.
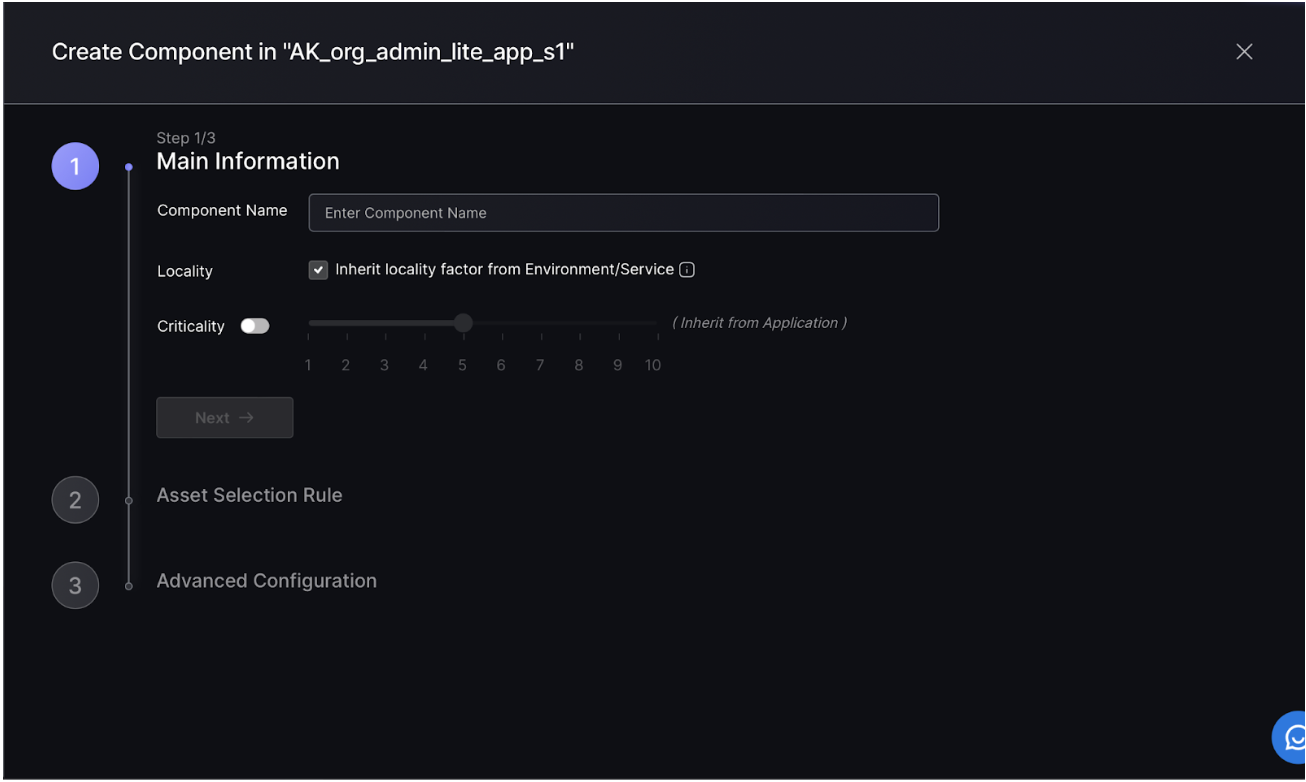
Step 1:
To create a new component entry, start by setting the component name, locality and criticality. If criticality is left unset, then the criticality of the parent application will be used.
- Component name – this can be anything but should reference the Application it has been added to, e.g. MyApp1 Component
- Locality – the default selection is for Components to inherit their locality from the Environment where the Application is deployed. This is the recommended selection as it ensures Components can be traced from where it is deployed and not where their assets are deployed, which makes the locality factor less accurate as it does not factor in if the Environment the Application is linked to is highly exploitable.
- Criticality – the default selection for this is to also inherit the criticality from the Application, which is the recommended setting as Components assigned to a critical Application will have the same context for being critical as their parent Applications.
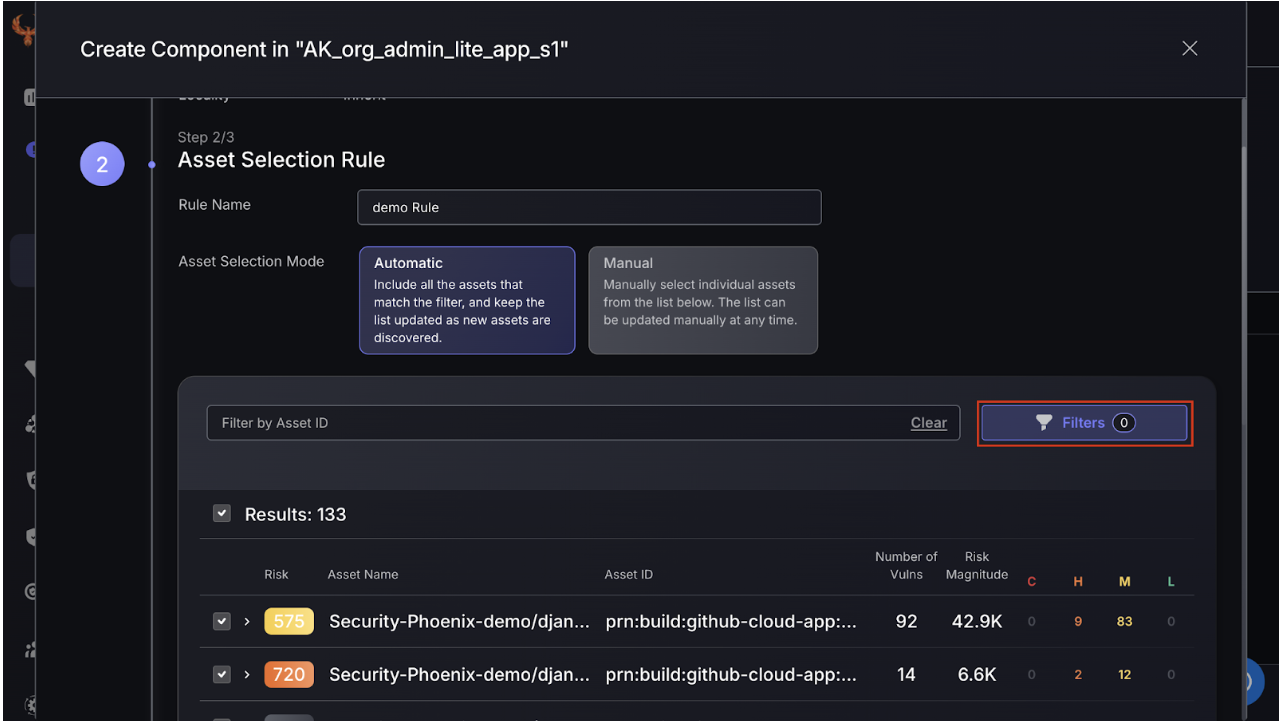
Step 2:
Next set up asset selection. Apply filters to select which assets are relevant to the component. Automatic selection is recommended as it ensures that when scanners pick up new findings, these are automatically added to the Component under the condition that it matches the applied filtering conditions.
Alternatively select assets manually. New findings will have to be manually added.
These choices can be updated at any point.
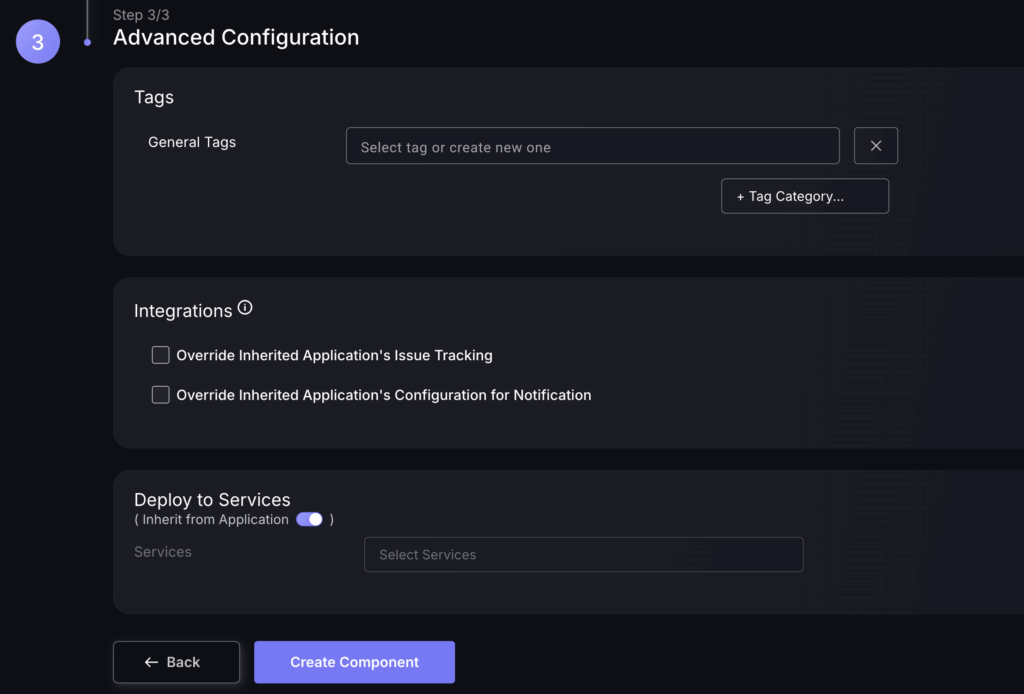
Step 3:
Select tags associated with the component. Issue tracking and notification configuration can be left as the same as the parent Applications or changed.
- Tags – Phoenix automatically applies tags to components, e.g. if a finding is weaponizable, but it is recommended that you also apply general tags if you have additional context about the Component.
- Integrations – leave these as they are unless you want this Component to be part of a different issue tracking project or Notifications channel as it’s parent Application.
- Deployment to Services – The default is to inherit this from the Application, which is the recommended setting unless you know that this Component is linked to specific services. Otherwise, the default is to inherit from the Services within the Environment that the parent Application of the Component is within.
Click “Create Component” to finish the process.
The process for adding a service is very similar (except starting from the Environments page).
2. Accessing Components
There are two ways to access the components of an app: Select the relevant application by navigating to the application page and using the search function to find the app.
This process is very similar for environments (except start from the Environments page).
By List:
- Select the Application the Component is within from the dropdown menu that appears once you click “Select Application“.
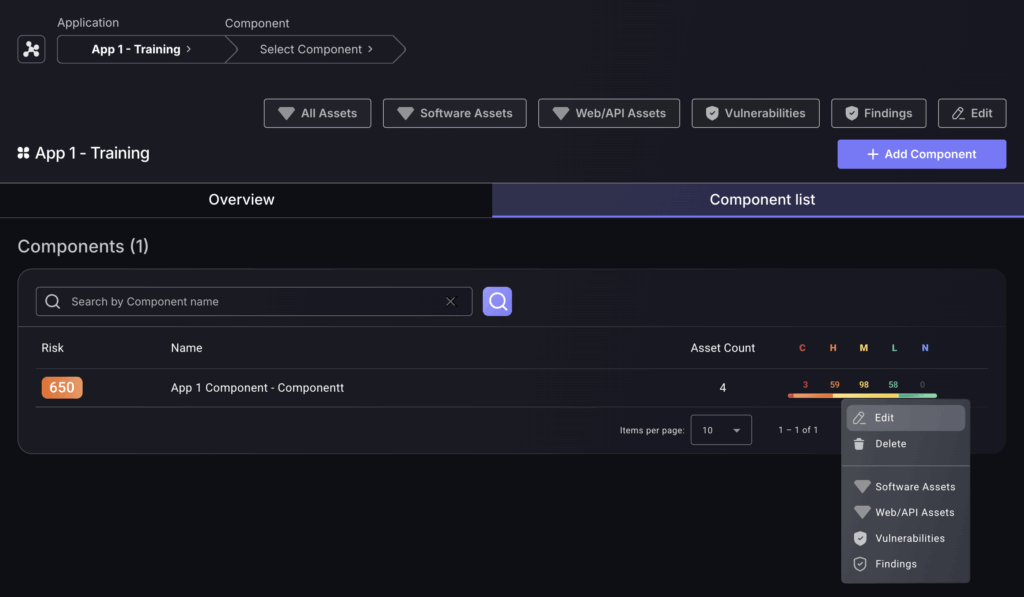
- Navigate to the “Components list” button, which is to the right of the overview button and press it to reveal a list of Components assigned to that Application.
- Navigate to a Component you want to edit/inspect and click on the three dots to the right of the Component to bring up a menu of options.
By Search:
Follow the same process of selecting an Application from the drop down.
Instead of going to the Components list, use the Components filter to select a Component from the drop down.

You can then edit the component by selecting “edit” as shown below.

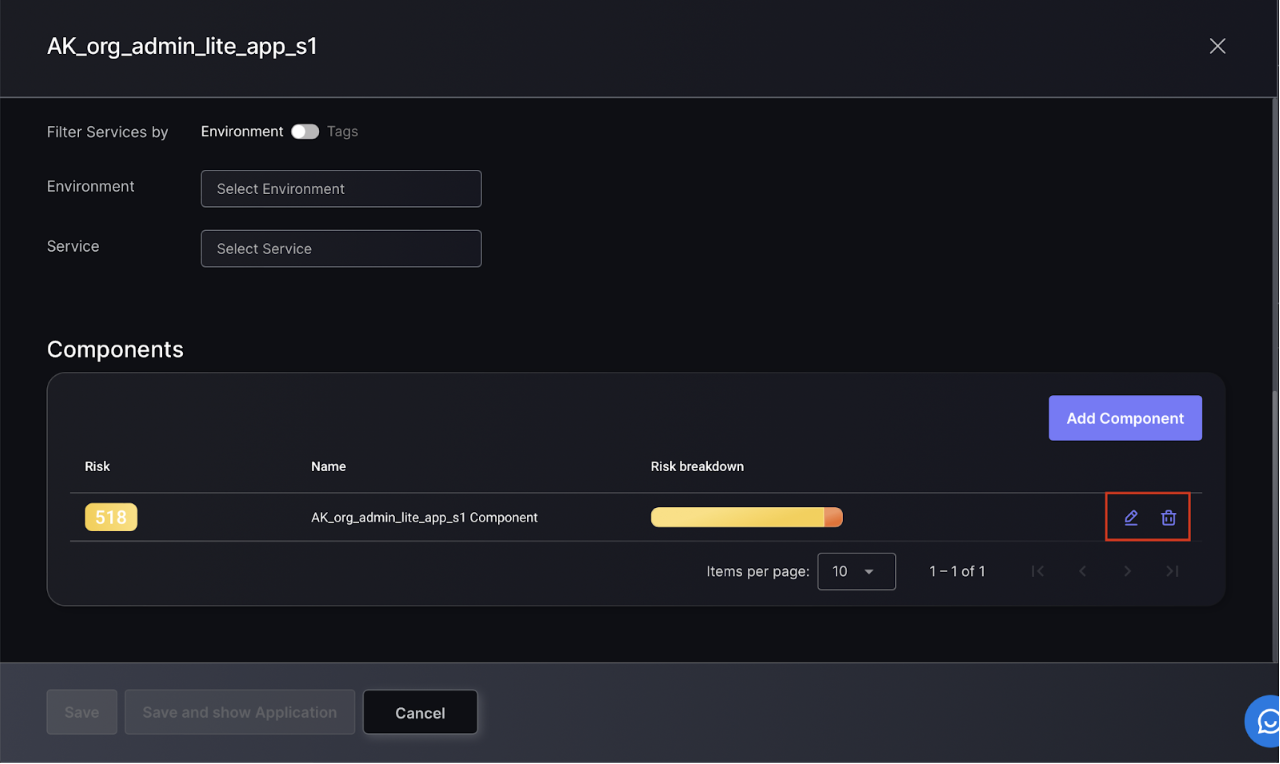
3. Deleting A Component
Select the Application you want to remove the Component from, then select “edit“, found on the right hand side of the page.
Click on the pencil icon to edit the relevant component and the bin icon to delete it.