In this guide we will use the term “asset” interchangeably to refer to both Phoenix Security’s Assets and ServiceNow’s Configuration Items (CI).
A. Integrating ServiceNow CMDB
ServiceNow API Credentials
In order to authenticate with the ServiceNow API server you need user credentials and a set of OAuth client credentials. You will need these details later, when configuring the integration in Phoenix Security.
User Credentials
In order to connect with ServiceNow from Phoenix Security you need he credentials (username and password) of a user that has the “itil” role assigned to it. The recommendation is to create a user specifically for the integration so that you can better control its credentials and permissions, but any active user with the right role/permissions would work. You can manage users within Service Now by navigating to Organisation > Users.
OAuth Client Credentials
As well as the user’s credentials described above, you need to create an entry in the Application Registry to allow Phoenix Security to access ServiceNow’s API. You can do that by navigating to System OAuth > Application Registry and clicking on “New“.
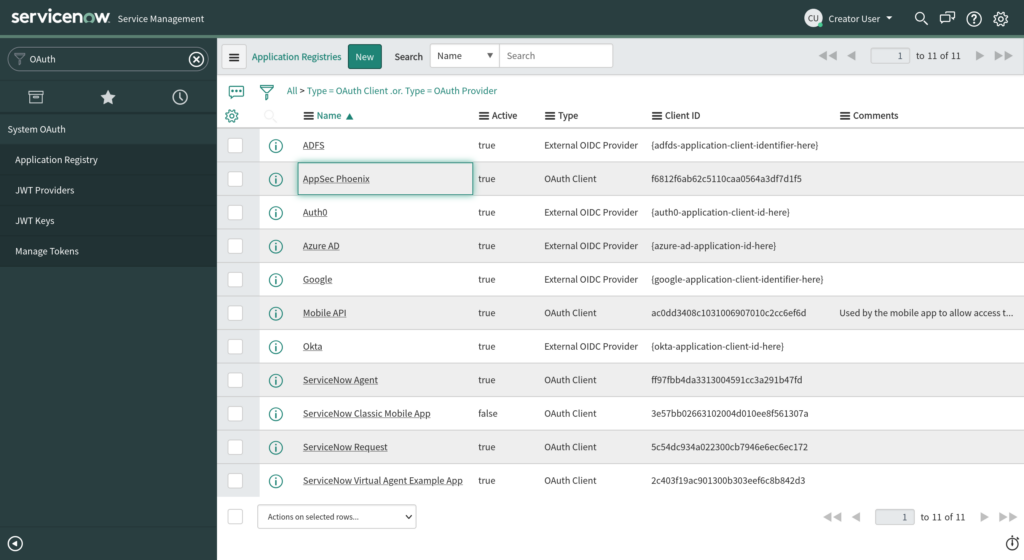
Enter a name for the client application and provide a client secret. Make sure that the “Active” tick-box is selected and leave the “Lifespan” default values. Then Save/Update the application entry.

Integrating ServiceNow CMDB within Phoenix Security
Before using ServiceNow integration features within your Phoenix Security instance, you have to set it up first by configuring the ServiceNow – Phoenix Security integration. Here are the steps to complete the integration process:
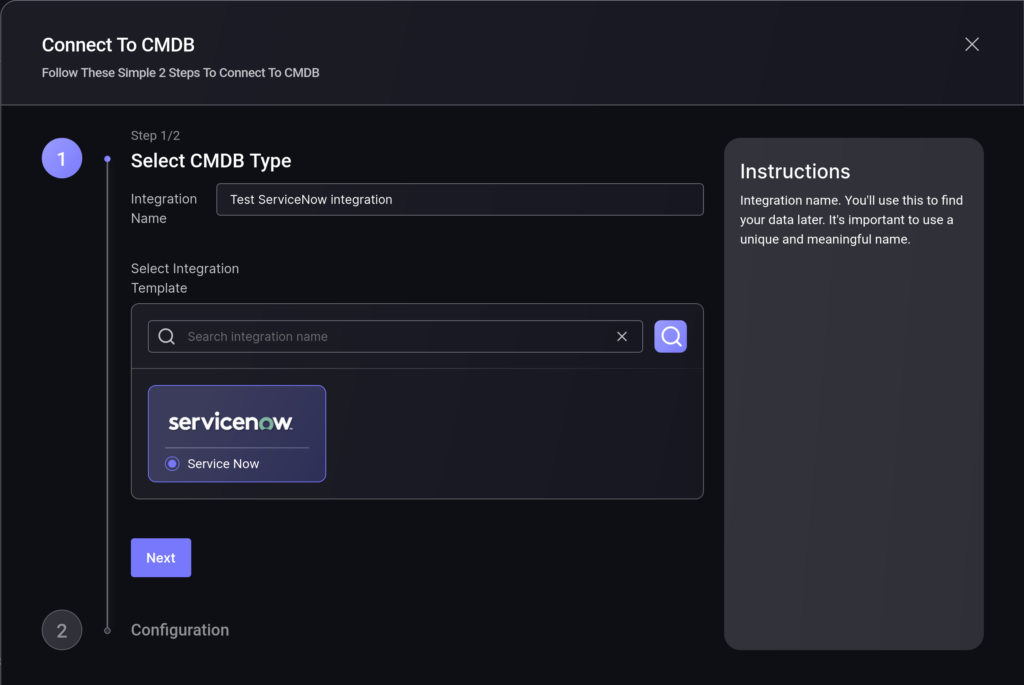
- On the Navigation Menu, go to Integrations > Asset Sources. Then click on the Add Asset Source button.
- In the first step enter a name for the integration and select the ServiceNow integration type. Then click Next.
- On the second step you need to provide the ServiceNow connection details discussed earlier in this article:
- The URL of your ServiceNow instance
- OAuth Client ID and Secret
- Username and Password
Note: These details are only stored after being encrypted with your Organisation’s unique key.
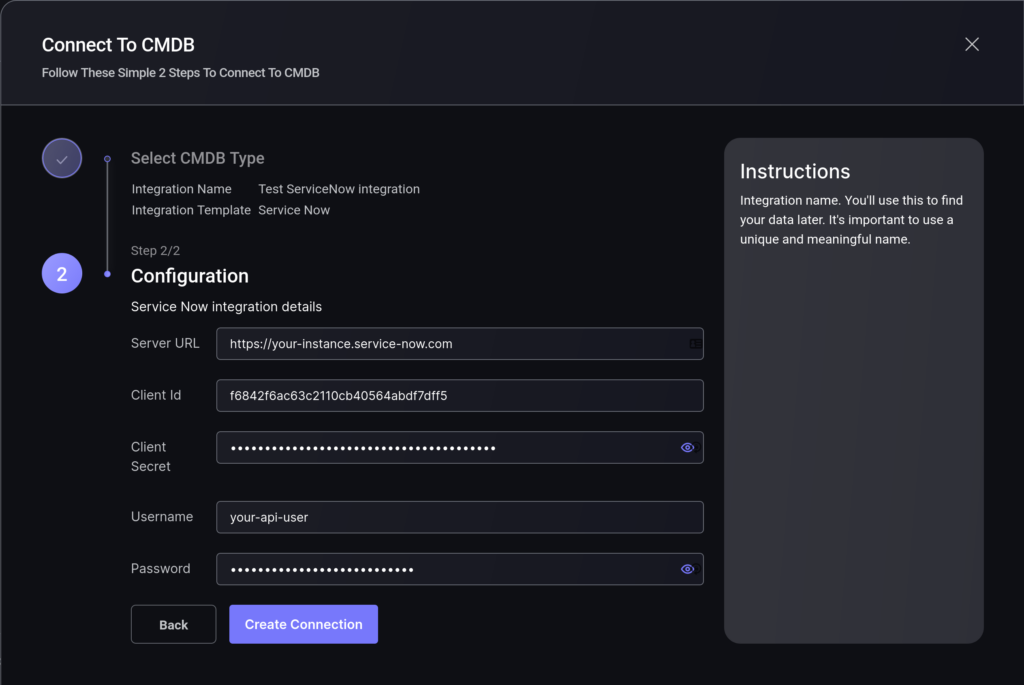
- Click the “Create Connection” button.
B. Viewing ServiceNow asset details
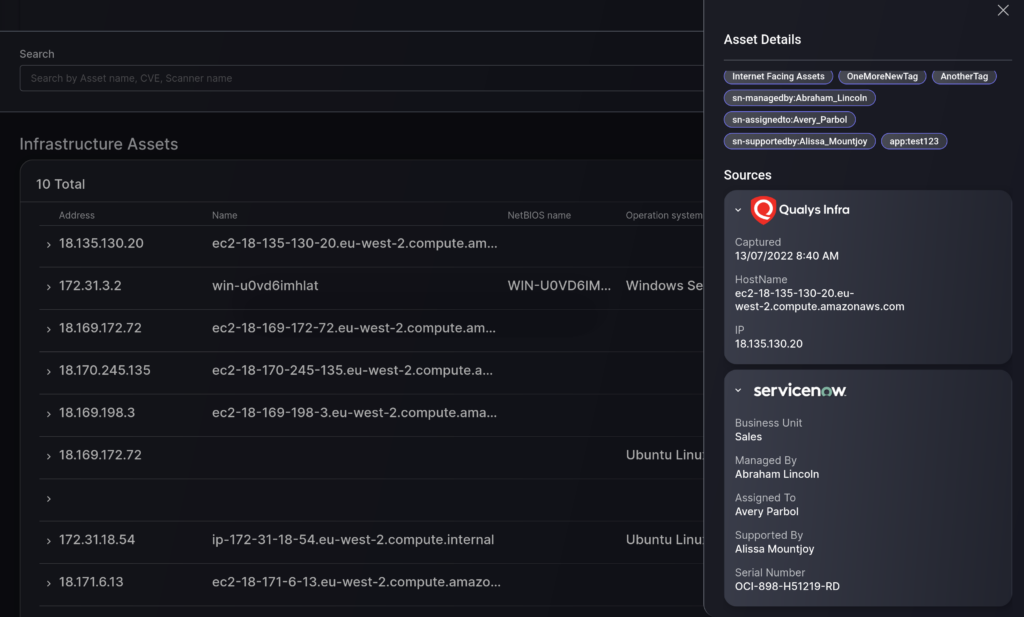
One the connection to your ServiceNow instance is completed, Phoenix Security will try to match assets that exists in both platforms and, when a match is found, transfers certain attributes from ServiceNow to Phoenix Security. You can see the results of this process in the Assets > Infrastructure page.
- On the Navigation Menu, select Risk Explorer > Applications.
- Hovering your mouse over the “information” icon in the Source column you can see which asset has details from ServiceNow (it will display the logo). Select “Details” from the contextual menu to the right of the asset row (triple dot) to see the assets details and what information has been pulled from the CMDB.
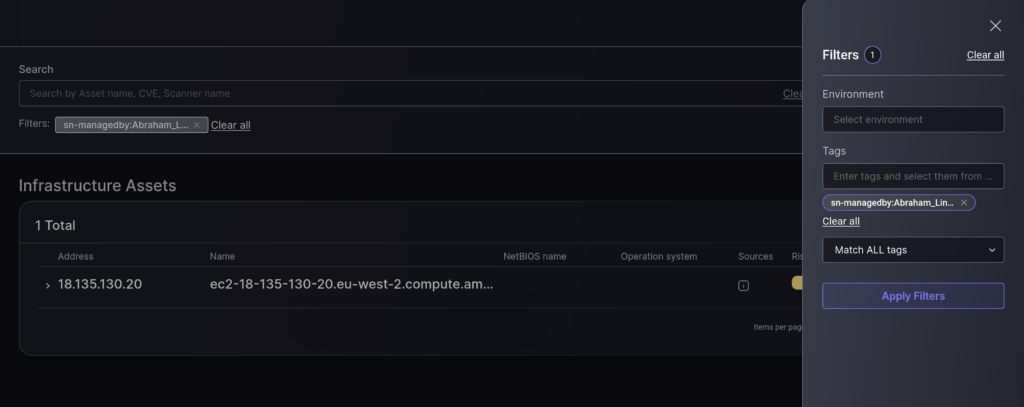
C. Filter assets using CMDB details
While staying on the Infrastructure Assets page accessed in the previous section, click on the “Filters” button to expand the filters panel and start entering the name of a ServiceNow tag from the asset details (the auto-complete feature will help you locate the right one).
Clink on “Apply Filters” to filter only those assets that match the selected tag.