Create a new Scanner Integration
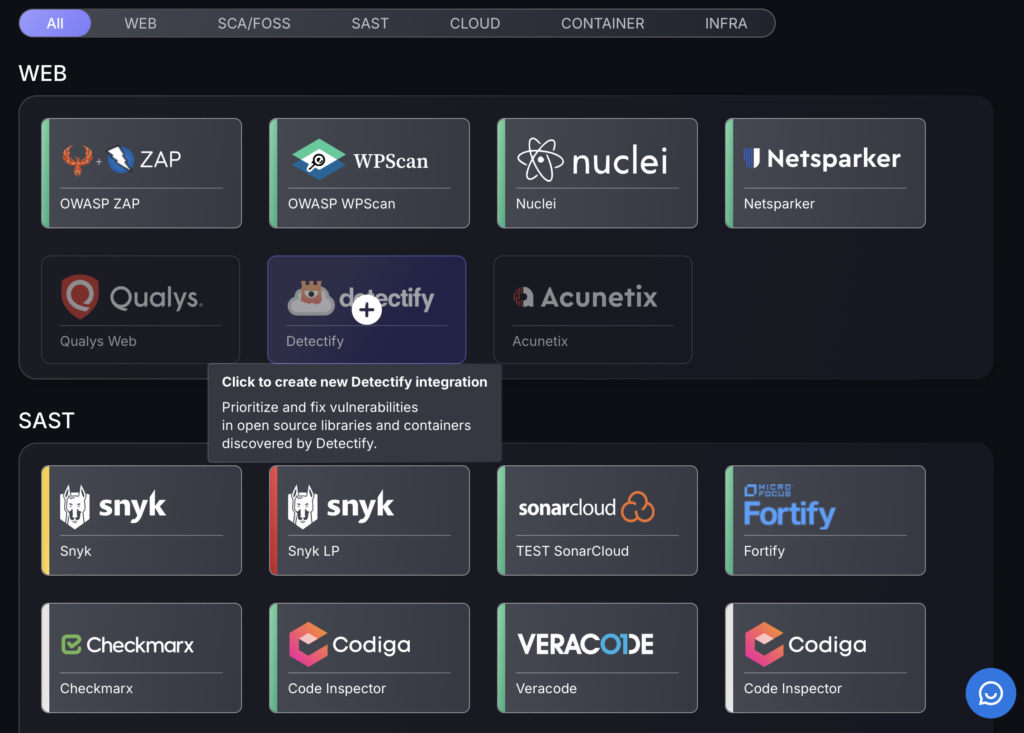
- On the sidebar menu, navigate to the Scanners tab in the Integrations section.
- Hover over the scanner template of the scanner tot be added and click on it to add the new scanner integration.
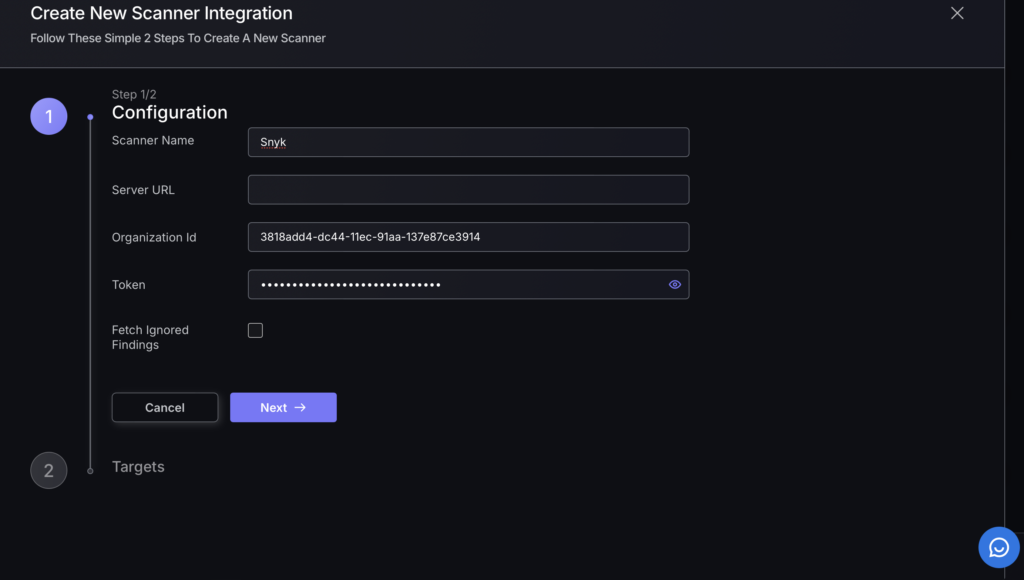
- In the first step, enter a name for this scanner integration. Also for Snyk you need to provide the Organization Id and the integration Token. Then press next to proceed.
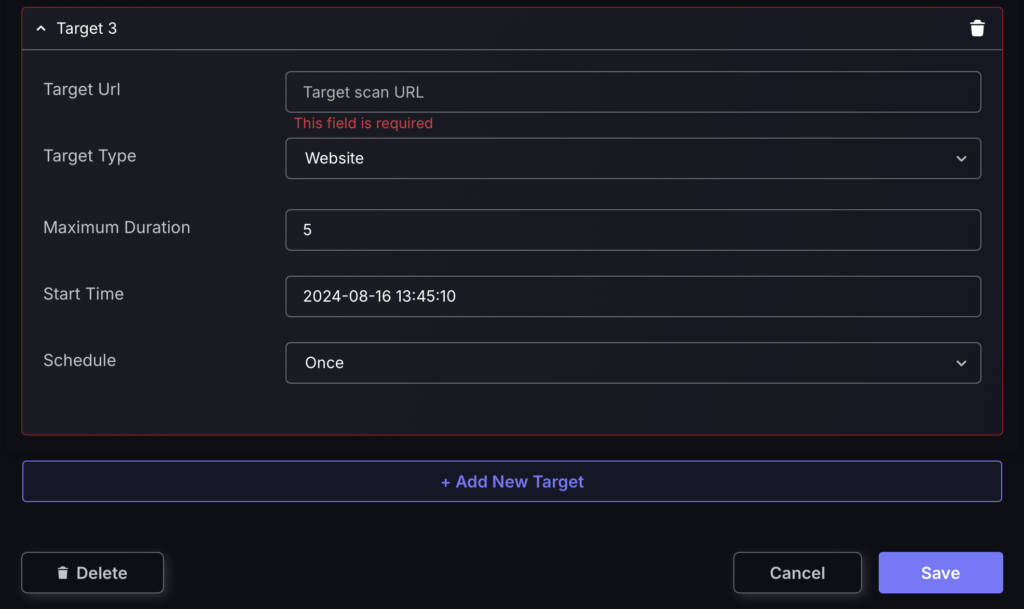
- On the second step you are given the option to create targets which set automated scanning of a specific server url at a set time.
In order to obtain your Organization Id:
- Sign into your Snyk account
- Click on the “Org Settings” icon (cog) near the top-right corner of the screen (highlighted in red below)
- Copy the ID directly from the “Organization ID” section of the page (also marked in red below).

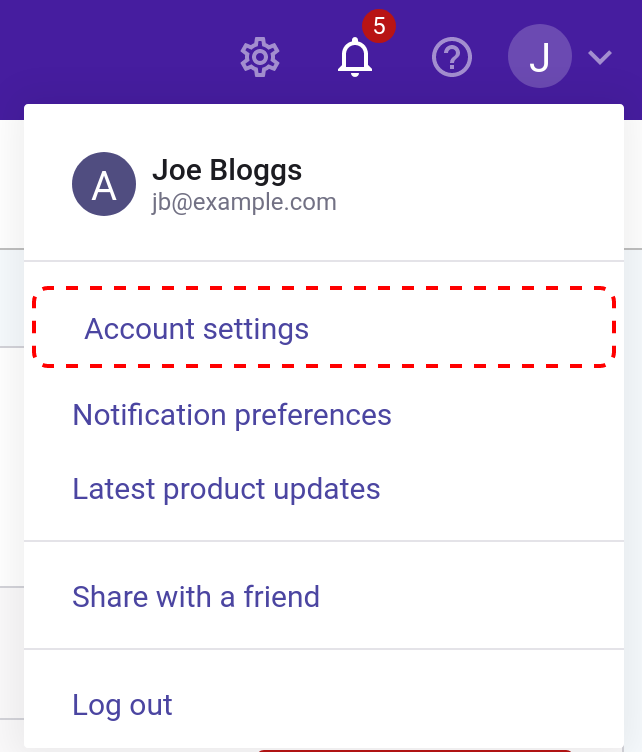
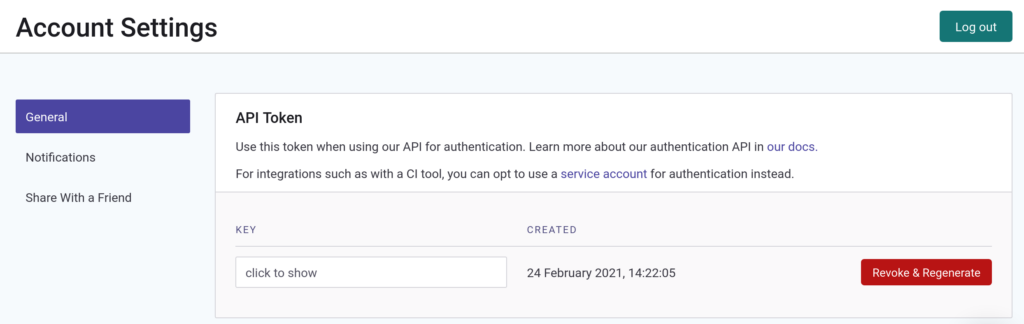
For the Integration Token, click on the user menu at the top-right corner of the screen and select “Account settings”.
In the Account Settings screen you can “click to show” the token and copy it from this page. Use the Revoke and Regenerate options as required.
Now that you’ve entered your API integration credentials…
5. Click on the ‘Create Scanner’ button
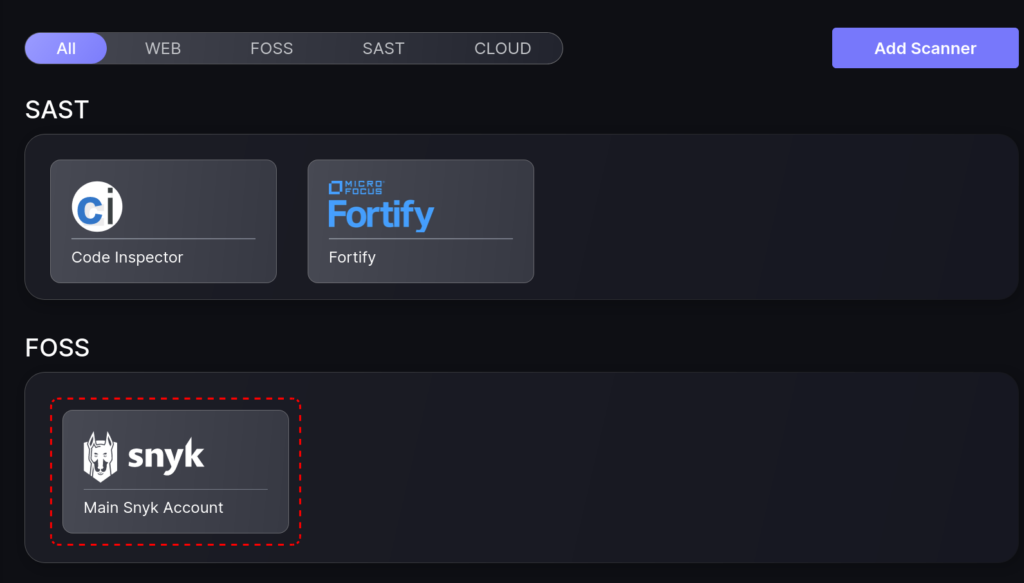
After the scanner integration is created the new entry appears on the Scanners list page. (Here showing the example from above highlighted in red.)
From this point onwards you will be able to select this scanner integration when creating Applications.